
The Know Your Camera Series: Understanding Aperture

Lens aperture: f/1 to f/32. From left to right, with each of the standard f-stops above, the amount of light entering the lens is decreased by half compared with the previous f-stop.
Aperture is key to giving your photos your desired look synonymous with your style of photography.
In the "Know Your Camera" series that will be intertwined between regular episodes, we take a deep dive into understanding the basics of our cameras. Knowing your camera is the most basic element related to what goes on behind the scenes of any photoshoot. You may have had the experience of something seemingly going wrong with your camera or you can't make a basic adjustment only to then realize it's because you accidentally touched or changed a setting. It happens to all of us. The better we know our cameras, the less likely to panic when this happens.
In this episode we talk about one of the fundamentals of photography, Aperture. Aperture is key to giving your photos your desired look synonymous with your style of photography. But in order to do that, you have to have a strong foundation and understanding of Aperture and how it works. Aperture is one of the elements of the Exposure Triangle but today, when we talk about Aperture we're only going to talk about Aperture. In future episodes, we will combine the elements of the exposure triangle-aperture, shutter speed, and ISO-plus other elements such as white balance and flash. But for now, we will discuss each element independent of all others.
I've found that this is the point where most people get lost: when someone decides that these elements are so basic they can be understood just in a few minutes. While that may be true for many, but it's not true for all, including me. It took me a long time get "it". My hope is that learning it this way will save you time and having you shooting like a pro in the fraction of the time it took me.
Here are some Highlights from this week’s episode about Aperture:
{5:51} What I'd like for you to do is, if you've tried understanding this before, and you didn't get it, please put that aside. Just think about this as starting from scratch and starting with a blank slate, because that's the best way to start understanding this.
{6:53} What starts driving people crazy about understanding aperture, is that it's somewhat counterintuitive to the way our brain works. When we talk about aperture, the smaller the number, the wider the opening of the lens.
{8:15} That opening in your lens controls the amount of light that passes through the lens to help create your image in your camera. It controls how well your subject is lit, given other factors that for now we're not going to talk about.
{11:43} Please don't try to figure out the mathematical rationale for these numbers. Just accept that these are the standards for each and every lens.
{14:05} As you go down this list of numbers, every number represents half the amount of light as the number before it.
{16:34} Just remember that when you move between two adjacent f stops, you're either doubling the amount of light that you're letting in, or you're decreasing the amount of light by half.
{20:53} As you move towards the smallest numbers, you get a blurring effect in your photos, meaning that the subject of your photo tends to be the only thing in your photo that is perfectly clear. It is the thing in your photo that is most in focus while almost everything else is a little blurry, or a lot blurry. A photo of an object at F 2.8 will have almost everything else blurred out, telling the viewer that this (what’s clear) is the subject of the photo.
{22:49} Each photo tells a different story and this is the beauty of shooting in manual because for the most part, you cannot accomplish this effect shooting in auto.
{23:33} So when determining your aperture there are two things ……for the purpose of this episode, there are two things you need to consider: 1) is, how much light do you want to let into your lens in order to light your subject the way you want them to be lit; and 2) what is the focus of your photo and what aperture best conveys that to the viewer.
{25:14} How in the world do you make sense out of all of this? This is what works for me, or what worked for me when I was learning this.
You don’t need a model to practice the basics. The photos below were taken across the room from my couch. I set the aperture to f-2 (this camera lens opens to to f-1.8 but for our example we’re starting at f-2) and dialed the shutter (remember, we’re only talking about aperture in this episode) until I got to usable photo settings.
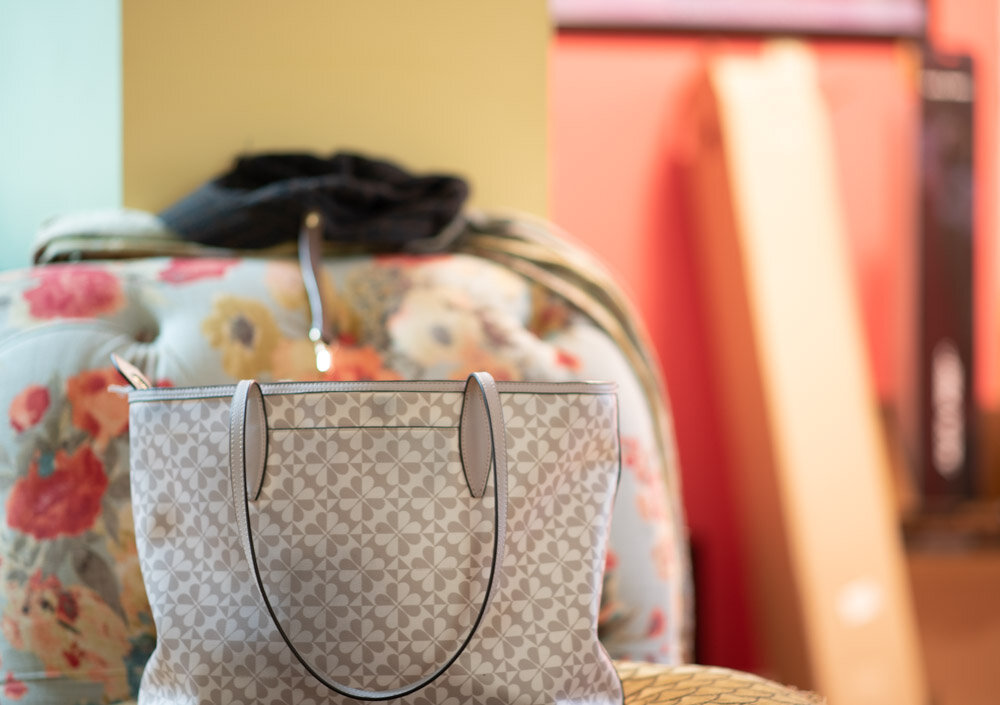
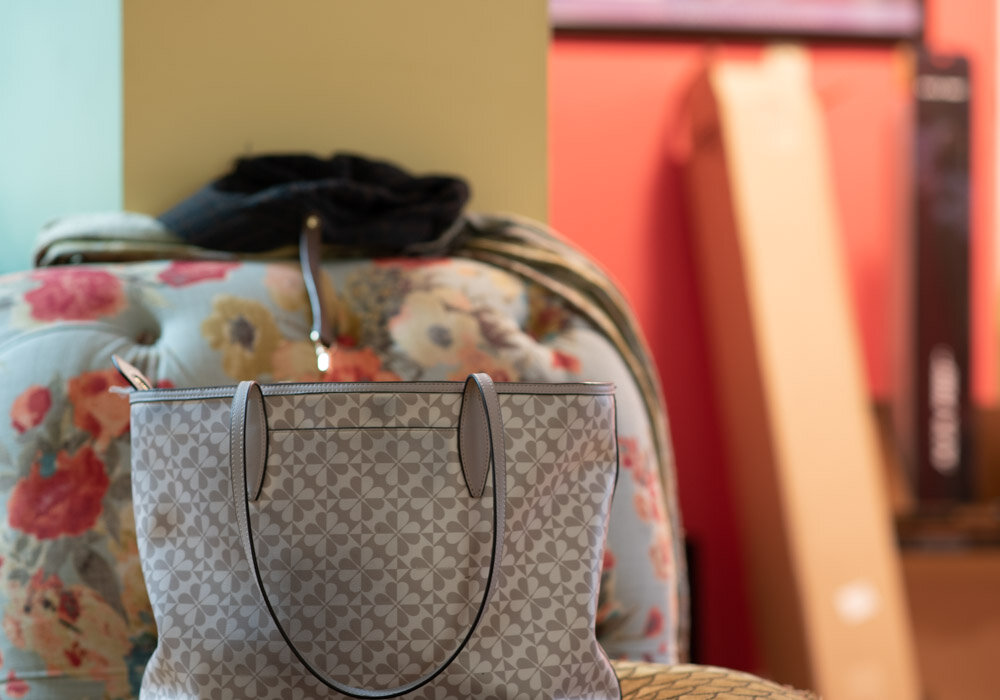
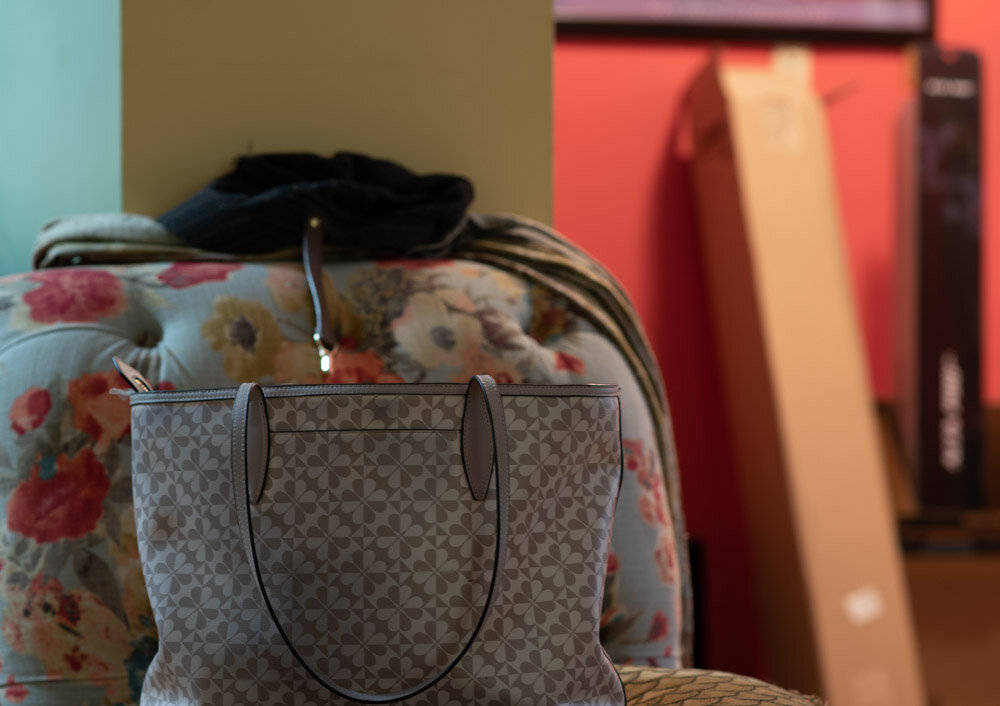
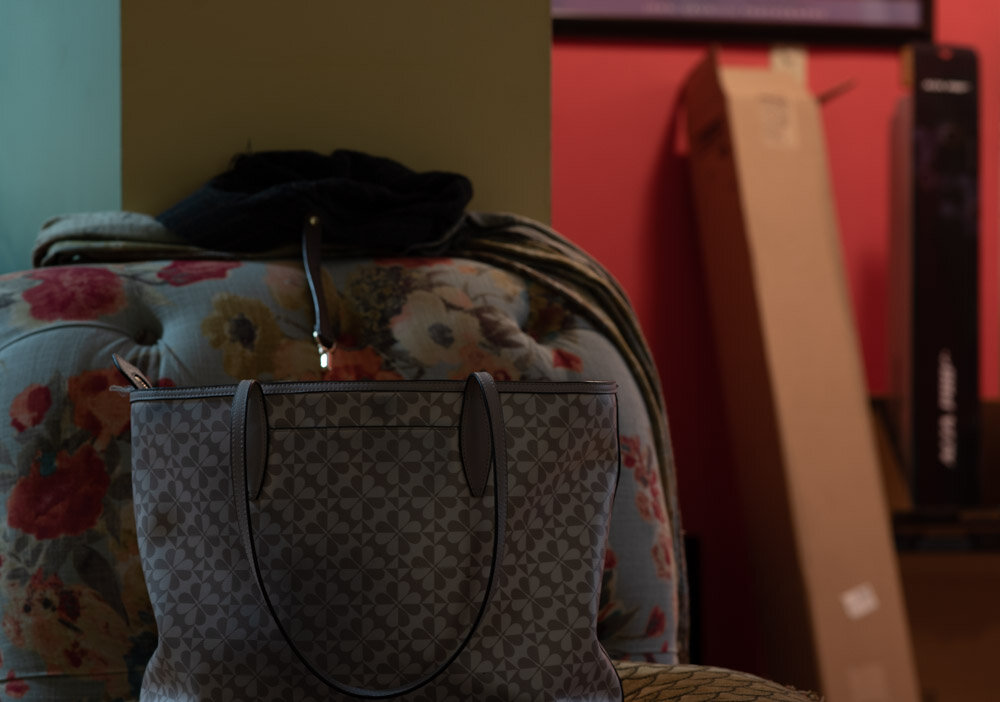
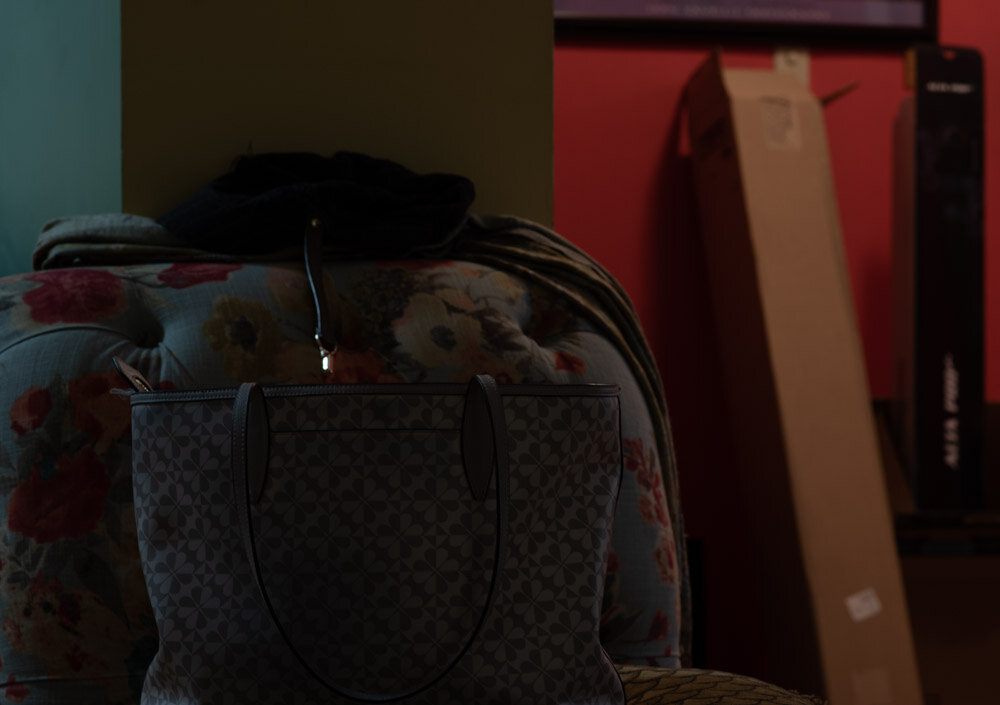
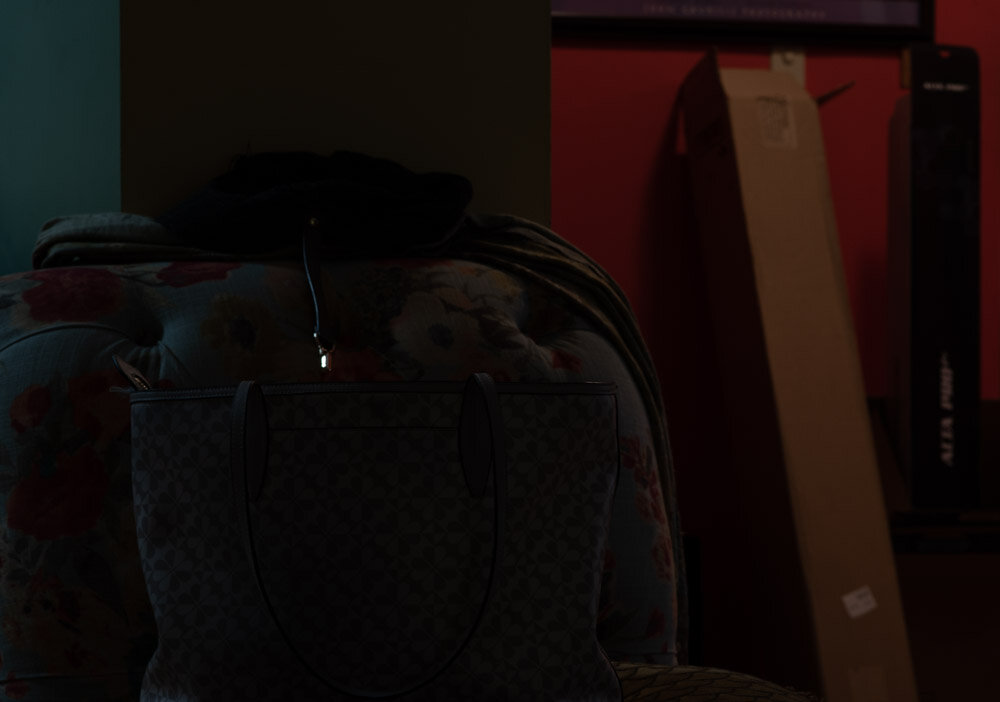
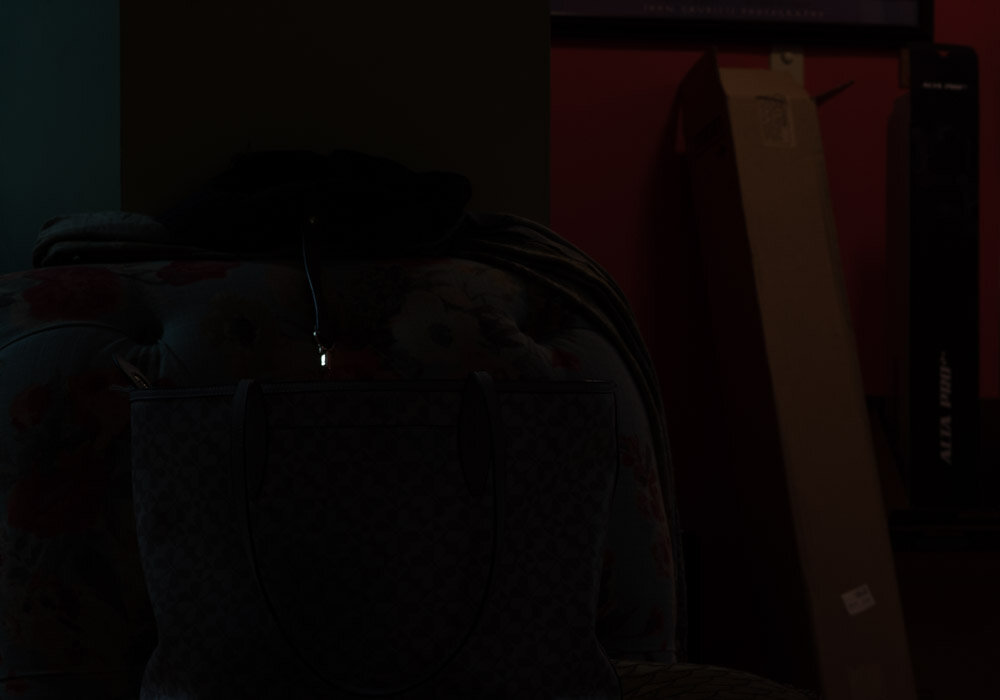
Click on photo to see the different apertures.
Here’a a photo of an object taken with a cluttered background starting at f-2 (the most amount if light allowed in), then at f-2.8, f-4, f-5.6, f-8, f-11, and f-16 (the least amount of light let in by this lens). As you click through, you will notice that with each f-stop, the amount of light in the photo decreases significantly, in fact by half. Also, notice that as the aperture closes down (meaning less light is coming in), the photo, in general increases in clarity beyond the bag and objects start to become more distinguishable. There is a fall-off point however where as the amount of light decreases the photo becomes significantly under exposed.